The Basics of Tube Plugs: What They Are and How They Work
Regular maintenance is essential to keep your heat exchangers in optimal working conditions. One aspect of this is catching tube leaks early and sealing them effectively. Doing so helps ensure a longer, more productive life for your exchanger while reducing downtimes and costs of addressing leaking tubes.
Using tube plugs helps you achieve secure and leak-tight seals, even under severe operational conditions. However, it’s essential to understand what tube plugs are and how to select and install them correctly. Otherwise, you will only be doing more harm to your heat exchanger.
In this blog, we discuss the basics of heat exchanger tube plugs and share some tips on finding suitable plugs for your equipment.
What Are Heat Exchanger Tube Plugs?
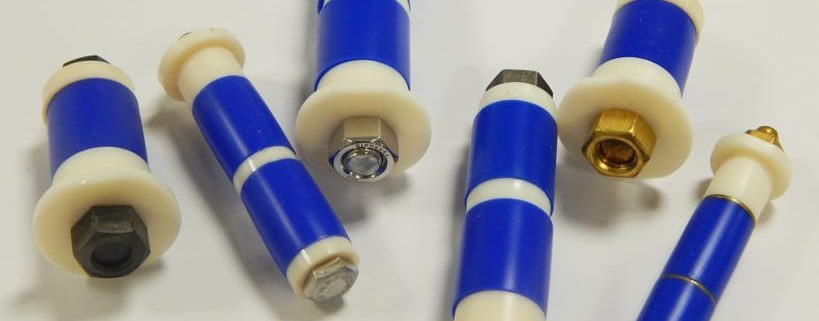
Heat exchanger tube plugs seal leaking tubes in tube bundles inside heat exchangers. When installed correctly, they can seal leaks permanently or temporarily for testing purposes later and maintain the best possible efficiency for an aging exchanger.
Why use tube plugs? You may wonder, can’t the leaking or damaged tube be replaced?
To answer this question, it helps to understand that the tubes in heat exchangers and boilers are densely packed together.
On the contrary, using tube plugs involves identifying the problematic tube and plugging it with the correct device to stop the leak. Since heat exchangers are built with extra tube capacity, plugging a small percentage of tubes will not significantly impact their overall efficiency.
How Heat Exchanger Tube Plugs Work
Tube plugs are inserted into the damaged tube to isolate it from the gas or liquid flow. This prevents leaks and ensures the efficient performance of heat exchangers, even as they age over time.
4 Steps for Effective Tube Plugging
Here are the general steps involved in plugging heat exchanger tubes:
STEP 1 – Identify the Leaking or Damaged Tube
The first step is to locate the tube to be plugged using a tube leak test gun and look for signs of corrosion.
STEP 2 – Clean the Tube’s Interior
Any debris or corrosion that might be present in the tube’s interior diameter or ID must be cleaned before installing the tube plug.
STEP 3 – Plug the Tube
Once the tube is cleaned and vented, the tube plug can now be installed.
If you use expandable plugs, installation is easy and requires little effort. Simply insert the plug into the tube and expand it by tightening the nut to create a tight seal.
STEP 4 – Final Check for Persistent Leaks
After the plug is inserted, check for persistent leaks before returning the heat exchanger to service. One way to do this is by conducting a pressure test on the heat exchanger.
The Importance of Proper Plug Installation
Tube plugs help address leaks, improving efficiency and prolonging the life of a heat exchanger. However, they must be installed correctly; otherwise, problems like the following can arise:
- Installing: Failing to clean the tube ID may result in an improper seal.
- Damage to the Tubes: Inserting the plugs too forcefully could damage the tube or tube sheet coating, requiring replacement.
- Increased Pressure: Failing to vent the tube before plugging can create pressure buildup, leading to issues like leaks, damage to the heat exchanger or even explosions.
How To Select the Correct Heat Exchanger Tube Plugs: Factors to Consider
Not all heat exchangers are the same, so the tube plugs you will use must be appropriate for your equipment. To help you select the correct device for your heat exchanger, here are the essential factors to consider:
1. Operating Temperature and Pressure
Knowing your heat exchanger’s operating temperature and pressure lets you know if you need a high- or low-pressure plug. For example, you need a low-pressure plug if your equipment has pressures less than 250 psi and temperatures no more than 300 degrees Fahrenheit. On the contrary, heat exchangers with operating pressures greater than 250 psi need a high-pressure tube plug.
2. Tube Size
You also want to ensure the tube plug you have matches the damaged tube’s ID. The most preferred way to determine a tube’s size is by directly measuring the tube to be plugged.
If you have no previous records of the measurements and the exchanger cannot be taken offline, design calculations can be made using the exchanger information. Here is the formula to be used: Tube ID = (Tube OD) – 2 x (Tube wall thickness).
3. Tube Material
It’s crucial to match the tube plug material to the tube as closely as possible. More importantly, using plugs of the same or compatible material prevents galvanic corrosion, an issue that can completely destroy a heat exchanger or condenser quickly.
HEPCO tube plugs are available in various materials to match a wide range of tubes, from stainless steel, brass and titanium tube plugs to non-metallic.
Where To Purchase Top-Quality Tube Plugs for Your Specific Application
When heat exchangers and condensers develop issues like leaks using tube plugs is a quick and cost-effective solution. By plugging damaged tubes, you can seal leaks effectively while keeping your costs and unplanned downtime minimal.
With that said, tube plugging must be done correctly. The right device must be used and properly installed to avoid further damage to the heat exchanger. Before you begin your heat exchanger maintenance, it’s best to get the right tools for the job ready.
At Heat Exchanger Products Corp, we manufacture top-grade non-damaging expandable tube plugs for several industries, including power-generating Nuclear and Fossil Plants, petrochemical, marine and pulp and paper. If the tube plug you’re looking for isn’t included in our listed items, we’ll work with you to design and manufacture custom tube plugs for your unique application.
Contact us today to learn more about our heat exchanger tube plugs, request a sample plug or get an online quote.


